Chapter 05: In the shop
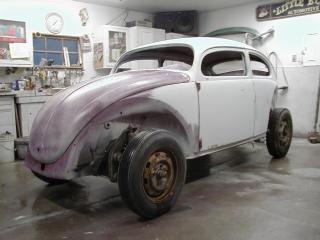
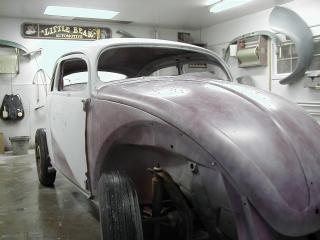
Oh yes. Work is proceeding apace. The top has been chopped and the primer stages have begun. These pictures are showing the middle of the first primer stage. The purple color is the base coat and the white is the actual primer. The primer get slowly taken off and imperfections in the body show up as purple. Once they’re smoothed out, the primer is reapplied and the body can be painted. What color, you ask? Well, I’ll have to get back with you on that. I’m currently thinking some sort of eggplant would be cool but I haven’t decided on a specific one yet. I’ll definitely let you know though.
As you can almost see in this picture, the door handles have been removed and the wells filled in. The rear view mirror mounting hole, as well as the antenna mount, have also been filled and smoothed. The gas cap on the right side has also disappeared. The current plan is to use a keg tank, or some other type of tank, with a filler inside the trunk. The only other thing in there should be amplifiers for the stereo. I’m thinking about using a peep mirror on the door which mounts to the upper part of the door. They’re about three or so inches in diameter and cheap enough to replace if I want to change to a different style.
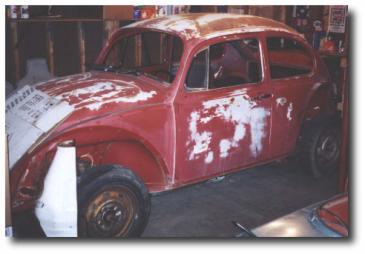
Here you can really see the difference in the chop. A total of four vertical inches was taken off, measured at the B pillar. Other measurements are about four and a half inches less glass at the windshield and six and a half in the rear window. Once the glass and seals go on the rear window will be extremely small.
It’s kind of difficult to see from these close up pics, but the lines have been maintained amazingly well. This chop has none of the rake that some vehicles have; instead, it keeps the overall graceful line all the way from the front down to the rear skirt. The drip rail is straight and the bump parrallel to the drip rail is as well.
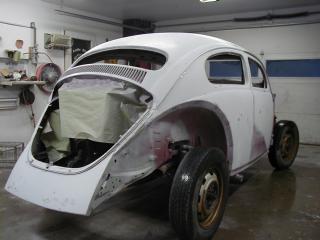
In this three quarter view shot from the rear, it’s a little easier to see the lines, not to mention the seriously small rear window. Heck, the vents below the window are almost as tall as the window itself! The skirt may look a little weird, but that’s because the corners have been pulled down a bit to match up with the fenders. The exhaust ports in the skirt have also been filled to give a nice onbroken line across the back when the fenders are on.
The rear curve in the rear quarter windows had to be almost completely reconstructed due to the reshaping needed when bringing the top down. Most of the metal right behind the window is patched (using metal from the leftovers of the roof and donor doors). The rear window itself had alot done to it as well as the roof had to be pinched due to the narrowness of the rear end.
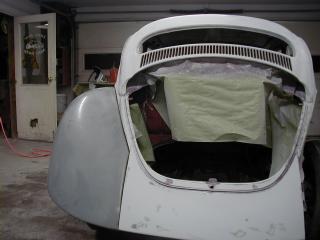
Here’s a taste of what it will look like from the rear with fenders on. Notice the line at the bottom where the fender meets the skirt. Smooth, eh? But, you may be saying to yourself: something looks different? Yes it does; the fenders going on Bugzilla are much wider than stock. The front fenders are three inches wider and the rear fenders are about four or four and a half inches wider. It’s going to take some big wheels to fill them out. More on that later.
The overall impression of the car may be that it was stepped on and flattened out. Heck with all that, I’m going for the roadster and coupe days of yore with big swooping fenders, itty bitty windows and the feeling that the car might want to get up and jump up and down on you for looking at it weird. Animalistic, so to speak.
Here’s a little shot from the sharp end. No, the hood hasn’t been stretched or anything, it’s the stock hood still. The trim mounting holes have all been filled but it’s the one that came with from the factory.
If you want to see the bigger version of some of these photos, go here. They were taken with an Olympus digital camera that belongs to a friend and they turned out great.